Detrek Browning stayed true to FMU and became the school’s all-time leading scorer
In an early January game against Clayton State, Detrek Browning waited calmly behind the three-point line while teammate Brandon Parker battled for a loose ball in the lane. Eventually, Parker swatted the ball towards Browning, who gathered it in, paused to set himself and casually flipped in a three-pointer that etched his name into a prominent place in the FMU record books. With that relatively unremarkable basket, Browning became something quite remarkable — the leading career scorer in the school’s almost 50-year-old history.
That the record-setter came on a routine play is not surprising. Browning’s calling card as a player is his ability to score, seemingly without effort; to make a unique ability to find ways to put ball basket appear quite ordinary.
What was remarkable about the play is that Browning was around to do it at all.
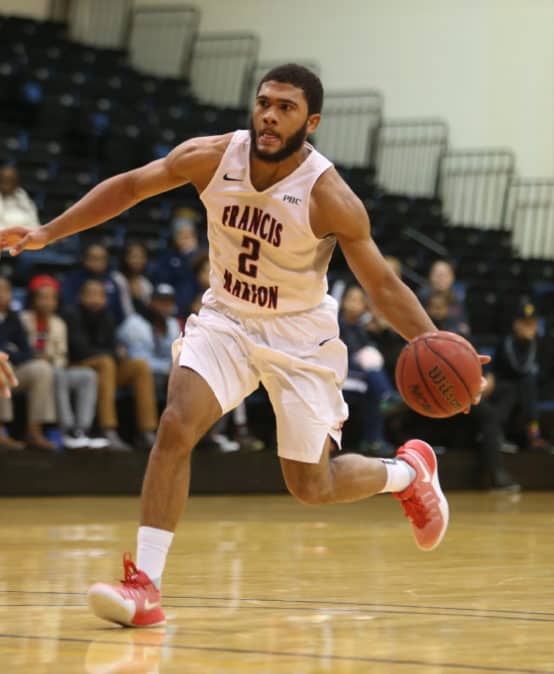
FMU Basketball standout Detrek Browning
The dynamics of college basketball at all levels have changed dramatically in the past decade. Players move regularly and easily from school to school, looking for the next bit of slightly greener grass; and there is not much hard-working coaches and schools can do about it. Their path is fraught with peril.
Bring a player along too slowly and he will leave for a situation where he can play/shoot/start more often. But, bring them along too quickly, develop them too well – and this is especially true for programs at Division II schools like FMU — and bigger schools will come calling. They can’t recruit a player, per se, until he puts his name on the NCAA’s official transfer list (which numbers each year in the thousands) but word gets around. Pssst. If your name is on that list. …
After he averaged 20.1 points a game for FMU in 2015-16, officially his sophomore season, word got around to Browning. There were schools out there – Division I schools – who were interested. And Browning knew the drill. Friends, foes, even some of his teammates, had gone that route.
“I was hearing from a few people,” Browning says, “and people were in my ear, telling me to go, that this was my big chance. But …”
But?
Browning shakes his head, shrugs his shoulders. The big decision, he says, was really no decision at all.
“Man, after all (FMU) has done for me … I mean, they were there for me when no one else was,” says Browning. “And the people here have always been great. This is where I belong. I wasn’t going anywhere. I guess maybe coach was worried, but I wasn’t leaving. “
Gary Edwards, Browning’s coach at FMU, admits to some nervousness during the spring in question. But those days are long past now and recalling them now brings a smile to Edwards’ face.
“Detrek’s done a lot of neat things here, made a lot of big plays, and he’ll always be one of my favorites,” says Edwards, “but if you ask me what I’ll remember most that’s it. It’s that loyalty that Detrek showed. That’s a rare quality. It’s better than all those points he scored.”
Things happen
Maybe Detrek Browning never should have wound up at FMU in the first place.
He wasn’t exactly a secret coming out of Irmo (S.C.) High School, just north of Columbia. Irmo, led by legendary coach Tim Whipple, is one of the premier high school basketball programs in South Carolina and Detrek Browning did nothing during his time with the Yellowjackets to lessen that.
Browning played three varsity seasons at Irmo and helped the team win two state championships. In his senior year Irmo went 29-0 — Whipple’s only unbeaten squad in 37 years at the helm — and captured Whipple’s fifth state title.
Browning may not have been — may being the key word — the best player on a team that also included University of South Carolina recruit Justin McKie. But he wasn’t a secret. He was receiving significant recruiting attention by his junior year and had a number of Division I programs giving him long looks.
But … things happened. One program that seemed like a sure thing signed another guard and never called Browning again. Another changed coaches. And so on.
Whipple says it was clear to him — then and now — that Browning belonged on a Division I roster.
“Oh, there’s no doubt that the could play at that level,” says Whipple. “But you know, coaches look at things … it’s tough. He (Browning) was a little small maybe, kind of got in that in-between thing position wise. Was he a point guard or a shooting guard? He didn’t play much point for us until his senior year. But maybe he’s a little small for a D-I shooting guard, maybe he’s not that fast … So …”
So, early that year, one Edwards’ assistants at FMU saw Browning play and suggested the Patriots make a run at him. Edwards saw him and quickly agreed — “best point guard I saw all year,” Edwards said.
Edwards found out Browning’s recruiting had taken a funny turn and put on the full court press. When Browning came for his official visit, Edwards offered him a full scholarship on the spot.
Browning held out for a little while, waiting for the “better” offer that never came. Eventually his own good sense — all who know him see him as an extremely well-grounded person — and a little hectoring from his mom made him a Patriot.
“I kept thinking, ‘maybe a bigger school will offer me something,’” Browning says. “Meanwhile, mom is saying, ‘are you crazy? They’re offering you a full scholarship. They really want you. You know what? She was right.”
Red-shirt tears
One more test remained.
Though a polished player for a freshman, Browning arrived on the FMU campus to find Evrik Gary — the number three scorer in school history — already ensconced in the point guard role. Edwards and the Patriot staff persuaded Browning that the thing to do was sit out — redshirt is the term — his freshman season, just as Gary had done.
The move made sense, but it’s easier said than done. Redshirts spend all the practice time that regular players do but don’t get to play in the games, can’t even travel with the team to away contests.
“You’re really on your own a lot of times and have to stay focused to keep working on things, getting better, on your own,” says Browning. “That’s a good thing. There’s a lot to get used to moving from high school to college. It helped with basketball, with school, with everything. I tell everyone now ‘Redshirt. That’s the way to do it. It’s the best thing I’ve ever done.’ But it’s not easy. I’ll have to say there were a few nights where a few tears were shed. “
Conserving energy
One point — not the first point, but a point all the same — that Browning would make about his game, about the way he plays basketball is that he can dunk the ball.
“Most definitely,” says Browning. “I actually have two dunks in games (at FMU). I guess there could have been more — fans would like it — but it’s not something I was ever that excited about. A bucket is a bucket. I’d rather conserve my energy.”
Good at energy conservation. Now there’s a line that doesn’t show up on many scouting reports. But that aspect of Detrek Browning, basketball player, says about as much about his game as any. He glides around the court, under control, moving from place to place — moving from the right place to the right place — with a studied nonchalance that lulls opponents, fans and even his own coach into a state of disinterest.
“He’s one of those guys,” says FMU’s Edwards, “where you pick up the stat sheet afterwards and you say, ’Twenty-five points? How’d he do that? I didn’t see that.’ He’s very, very smooth.”
Browning’s chief skill is an absolute intangible. He has innate understanding of the game that allows him to see plays before they develop.
“It doesn’t just happen,” explains Browning. “I’ve had some very good coaches. And I do think about all the plays. I just think about them five or 10 seconds before they happen.”
Which is five or 10 (or more) seconds ahead of most.
Speed, shooting kill
The awards and honors are piling up fast in Browning’s final season. He’s been the Peach Belt Conference Player of the Week four times (through January), set the FMU single game scoring mark (41 points) in early January and is clearly poised to post-season accolades as well.
It’s all well-deserved, but still surprising all the same for Browning seldom looks like the best athlete on the floor. The 6-0, 180-pounder is a little stocky as basketball players go, and doesn’t have the chiseled musculature of some. His two dunks aside, he is not a great leaper, and he’s probably not the fastest guy around either, although as dozens of oft-burned Peach Belt Conference foes would attest, he is plenty fast enough.
Browning comes from a very athletic family. His mom (Carlissa), various uncles and aunts and cousins all played college sports. His brother is a good bit heavier than Detrek, “but can still beat me in a race. He can fly.
“My uncle (Milton Kershaw) who played football in college and is just crazy fast, taught me early on that speed kills,” says Browning. “It’s the most important part of most sports. But it’s not necessarily who is fastest. It’s who can be fast when they need to be.”
Browning is a fine defender (he will finish his career among FMU’s all-time leader in steals, too), but what sets him apart are his offensive skills. In Browning’s mind — a good place to start for analyzing basketball — the key skill is shooting. He has simple mechanics and feel for the shot that came to him almost from the moment he took up the game — he hit a long buzzer beater to win the championship game in his first year of organized basketball at age 12.
“If you can shoot the basketball, I mean really shoot it, you are basically unguardable,” Browning says. “Try to stop the shot and it’s a fake and I’m by you for a pull up (jumper) or a layup. Try to stop that and …. “
His voice trails off. Another basketball thought has popped into a mind that processes such information at an astonishing rate.
“It’s always amazing to me the number of basketball players — Division I players — really can’t shoot,” says Browning. “That’s kind of the point of the game isn’t it?”
The Gary plan
Browning plans to follow in the footsteps of his former teammate Gary and play basketball professionally for as long as he can. Gary has been on an oddball world tour since he left FMU — Luxembourg, Bulgaria, Dubuque, Iowa and now, Cyprus — but he’s got a suitcase full of memorable experiences and … he’s still playing. The dream is still alive.
Browning understands. He knows he can play at a very high level and is eager to prove it, even if that means traveling some strange roads and learning even greater patience.
Whenever that is done, Browning suspects his long-term future lies … in coaching. He’s a Dean’s List student who’ll graduate in May with a degree in Psychology, and reservoir of knowledge that he thinks will translate nicely in that field.
“I seem to have a pretty good understanding of basketball,” says Browning. “I think that (coaching) could work out.”
Indeed.